
Embroidery Sampler
- Marjorie Monroe-Fischer
- Jul 5, 2020
- 2 min read

Why make an embroidery sampler? Are you learning new stitches? Using new materials? Using new techniques? There is always a learning curve with anything new, even if one is an experienced embroiderer.
The picture above is my sampler for learning Elizabethan embroidery (ignore the bug - that was my first foray into goldwork embroidery). Not only am I learning new stitches, I am learning how to use the extremely fine silk embroidery floss which I brought home from China and gold passing thread.
For those like me who learned to begin with knotted thread, starting without a knot is easy and clean, but takes a little practice. Using a standing frame allows one to keep one hand above and the other below. Relearning this technique takes a little time, but is well worth it.
The extremely fine silk floss catches on every irregularity of one’s skin which requires practice to avoid (as well as buckets of hand cream and an emery board!). The silk floss that I have purchased in the States is completely different - heavier and less likely to catch. Then there is the question of how many strands to use. Here are the pink (Elizabethan corded detached buttonhole stitch) and teal flowers (adding some satin stitch) where I used one strand. Lovely but extremely tedious and much smaller than actual period embroidery.

The purple rectangle is three strands - too heavy for my taste. It is also an example of why a sampler is good - sloppy stitching!

On the pansy and daffodil (much improved samples of Elizabethan corded detached buttonhole stitch) I used two strands which I like. My stitches are getting cleaner with each petal and leaf! I found that outlines in chain stitch need to be tight with short stitches. The bottom petal of the pansy shows how incongruous stitches that are too long look. Notice the stem - beeswax helps tremendously!


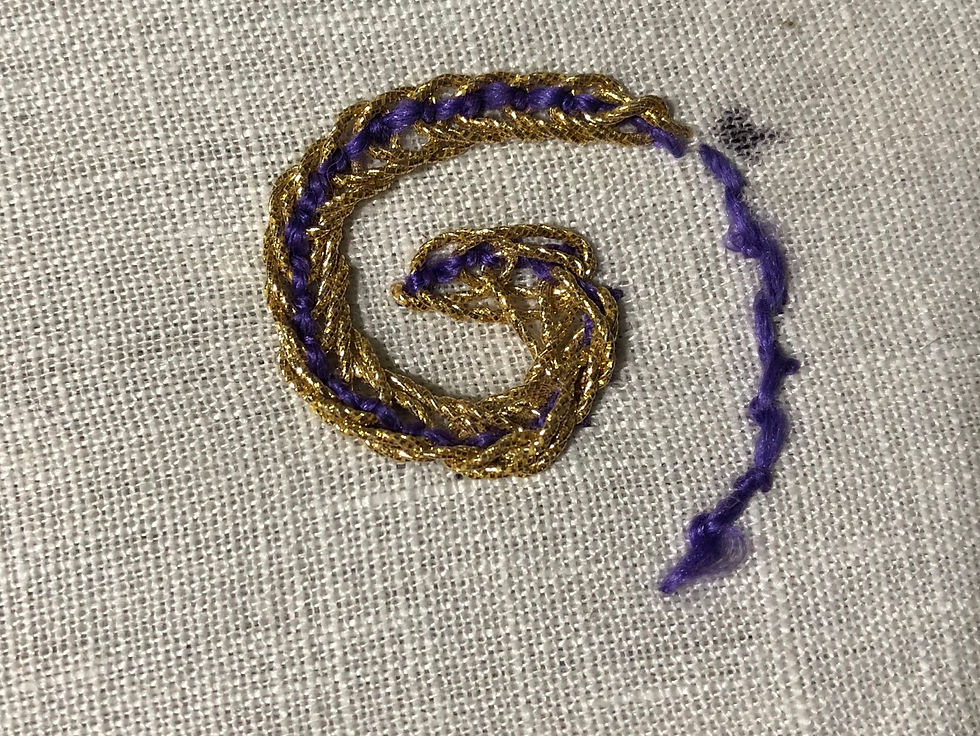
Then there is goldwork. First of all, practice with the real thing; it handles completely differently than the look-alike. The purple centred spiral (Elizabethan double looped edging) uses real gold passing thread. The beginning purple stitches were incorrectly executed, so I started the gold where the stitches were correct. I quickly learned to be very careful when handling the gold passing thread, and not to expect it to be able to follow such a tight coil. Important for my design!
After practicing with the fake and real gold I went back to silk work. Another lesson learned - execute all silk work before adding the gold! The silk catches on the gold thread. (Gold passing thread consists of a thin ribbon of gold spirally wrapped around a core of silk threads. The edges of the gold ribbons catch the silk filaments.)
For the bird I plan to try combining different colours of silk as done in period. It should give me some interesting colour combinations. By the time the bird is finished I think I will be ready for the actual piece, a fully embroidered coif similar to this extant example:

Happy stitching!


header.all-comments